How to Repair an Aluminum Fence
Aluminum fences have a reputation for their extended lifespan. In most cases, with proper maintenance, these metal fences can endure for 30 years or longer. Nevertheless, weather conditions, frequent use, or ground shifting may lead to unanticipated damage. In this blog, we’ll discuss how to repair an aluminum fence in detail.
If you need to repair other types of fencing, check out our ultimate fence repair guide here.
How to Repair an Aluminum Fence
In this section, we outline how to repair an aluminum fence and common issues through our easy-to-follow step-by-step guide. We will address various problems may arise and the specific ways to fix those issues. Before you start your repair, it is good to know the style of your aluminum fence that may provide specific repair solutions.
Issues with Uprooted Fence Posts
Fence posts serve as your fence’s essential support structure. Issues with uprooted fence posts can be quite common. Most issues are caused by the freezing and thawing of the ground during winter, leading to expansion and contraction that cause the uprooting of the fence post.
Step 1: Relieve Tension From the Posts
When the fence posts are uprooted, you will need to relieve the tension that is putting extra weight on the posts and causing the fence to lean in a certain direction. Use a 2×4 or rope to pull the fence back into place and release the tension.
Step 2: Detach the Fence Pickets and rails
Depending on your fence’s configuration, use a wrench or appropriate hand tool to unbolt or unhook the fence pickets and rails from the posts.
Step 3: Remove the Posts
In most cases, you will need to dig the post down to the concrete footing. Using a sledgehammer or an electric jack hammer to break up the existing concrete.
Step 4: Prepare the Post Hole
Adjust or re-dig the hole for the new post with a post hole digger or a shovel. The hole should be bell-shaped, wider at the bottom, approximately 10 inches wide. Depending on where you live, your frost line will be different. You need to dig below the frost line otherwise the post will uproot again.
Step 5: Install the New Post
Place the post in the hole, either reuse the old one if it’s in good condition or install a new post. If the posts were initially anchored in concrete, you would need to dismantle the old footing with a sledgehammer and excavate it. After that, reinforce the posts and pour new cement. Follow the manufacturer’s instructions to add concrete. Ensure the post is centered and level.
Step 6: Reattach the Fence
After pouring concrete, it’s essential to let it dry completely. Once dried, you can cover it with dirt or grass. Next, reattach the fence rails with new hardware if necessary. However, if the existing hardware is in good condition, you can reuse it. The type of hardware that you need depends on the kind of fence you have. It’s crucial to ensure the post is straight and centered during this step to avoid redoing the work. Be meticulous and take your time to get it right.
As long as you’re willing to put in some physical effort, replacing or repositioning fence posts can be a manageable do-it-yourself task. If you lack the time or energy for the job, you can always turn to a fencing company to do the job efficiently and correctly.
Damaged Rails or Fence Sections
Aluminum and steel fences are highly resilient, but they can be subject to damage from factors like strong winds or fallen trees. Unfortunately, replacing a single broken rail isn’t feasible; you’ll need to replace the entire length of the panel. Just make sure the new section matches the fence’s color.
Step 1: Remove the Old Panel
Use a reciprocating saw to cut the damaged panel on the side attached to the post. Remove the screws from the other side and pull the panel towards you to free it from the fence. Set the old panel aside.
Step 2: Install the New Panel
Insert the new panel’s rails into the corresponding post slots on the side where you removed the screws. If the rail is on the end of the fence, use a reciprocating saw to trim the rail.
Step 3: Secure the New Panel
Attach railing brackets to the cut end of the rails and screw them into the posts. On the non-cut end, reattach the screws or use new ones if necessary.
Issues with Your Gate
The solution to fixing your gate depends on the root cause. Here are some specific issues and recommended ways to fix them below:
Squeaky or Sticking Gate: Apply a lubricant such as White Lithium Grease to maintain regular hinge and moving part lubrication to ensure proper gate function.
Damaged Gate Post: Posts that are damaged or misaligned can affect the gate’s operation and may necessitate repair or replacement. A leaning post can lead to a leaning fence. Follow the instructions for removing a fence post, with first removing all gate hardware.
Gate Hinges: If lubrication doesn’t resolve the problem, consider inspecting for rusty, loose, damaged, or visibly worn hinges that may require replacement. Below is a step-by-step process to replace the gate hinges.
Step-by-Step Process to Replace Fence Gate Hinges
Step 1: Assess Hinges
Begin by verifying that it’s indeed the hinges that require replacement. Gate post issues may sometimes mimic hinge problems. Additionally, check which hinges exhibit wear, damage, or rust and consider replacing them all if issues persist.
Step 2: Remove Hinges
To support the weight of the gate door, place a piece of wood underneath it—this step is crucial to prevent damage. Use a power drill to remove the screws attaching the hinges to the gate and post. Be cautious not to let the gate sag, as it could result in damage.
Step 3: Quality Check New Hinges and Hardware
Damaged hinges are often a consequence of improper hardware. Common issues include hinges not being heavy-duty enough, lacking outdoor ratings, or having screws of incorrect size. After inspecting, ensure you obtain the correct number of hinges, suited to the right type and size, to avoid needing replacements in the future.
Step 4: Replace Hinges
If the new hinges don’t match the old screw holes, measure and mark the locations for drilling new holes using a measuring tape. Use a power drill with a metal-rated bit to create these new holes. Attach the new hinges to both the post and gate following the manufacturers specifications for weight and screw length to prevent sag.
Addressing Rust and Dirt
Rust and dirt detract from your fence’s visual appeal and can lead to more significant issues, such as accelerated corrosion, material disintegration, and structural weakness. Here’s our recommended solution to address dirt or stains, followed by a step-by-step process to eliminate rust below:
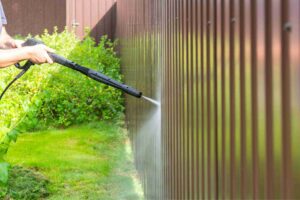
Dirty or Stained Fence: Aluminum fences be cleaned easily. To address dirt or stains, use a power washer with an approved power washing soap or clean by hand with soap, warm water, and a brush. Finish by rinsing with a garden hose.
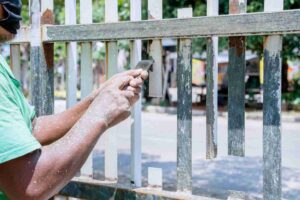
Eliminating Rust: Over time, metal fences and wrought iron varieties, will inevitably develop rust. Exposure to heavy rain or saltwater can accelerate this process.
- Removing the Rust: Take sandpaper or a wire brush and vigorously remove the rust from the affected area. You can also use a power-sander so long as the sand paper grit is not too coarse.
- Apply Rust-Inhibiting Primer: Coat the spot with a rust-inhibiting primer. While spray painting is quicker, brushing the primer ensures longer-lasting protection.
- Coat with Exterior Enamel: Apply a layer of exterior enamel by spraying or brushing it onto the surface.
To extend the lifespan of your fence, incorporate regular rust checks and fence cleaning into your annual yard maintenance routine.
How Much Does It Cost to Repair an Aluminum Fence?
The cost of a metal fence repair across the country typically ranges from $600 to $1,000. The most common cost is as much as $800, which covers expenses like removing rust, repainting a 50-foot metal fence, and securing four posts. On the lower end, fixing a single panel of a damaged 6-foot tall aluminum fence may cost as little as $150. Although, addressing issues with a 7-foot tall wrought iron fence, which spans 150 linear feet and involves decorative railings and posts, could cost as much as $7,500.
If you need professional help repairing your aluminum fence, it’s essential to know that some issues need a custom solution. Take advantage of unbeatable fence repair services tailored to meet your financial requirements. Contact us and get a free estimate today.


